Short rows - Introduction and Wrap-and-Turn Method

This blog post is the first in a series of three excerpted from an article I wrote for Interweave Knits in 2004. Parts 1 can be found here and 3 will follow this week.
Short rows, also known as partial or turning rows, appear daunting to some knitters but are in reality very simple: work extra rows across a portion of the stitches on the needles, thereby lengthening the fabric in the area where the short rows are worked. Short rows can be used to shape shoulders, custom fit the bust area, and impart design elements such as staggered stripes.Many knitters shy away from short rows — it isn’t that they have trouble working just some of the stitches on the needle, it’s the fact that that doing so produces a hole in the knitting. Although in some cases the holes can be design elements, in most cases, they distract from the purpose of the short rows—invisibly adding length to a particular area of a piece. However, there are several ways to eliminate (or hide) the holes so that the short rows become nearly invisible. This post focuses on a variety of ways to work short rows in stockinette stitch (knit on right-side rows; purl on wrong-side rows).Before beginning, you should be familiar with a few terms. The turning point is the place where the knitting changes direction between one row and the next (much like making a U-turn when driving). Unless you do something to prevent it, a hole will form at the turning point. The turning yarn is the section of working yarn that marks the turning point. The turning yarn is used to hide or mask the hole on a subsequent row. The stitch mount is the direction that the stitches lie on the needle. For the purposes of this article, we’ll assume that the “correct” stitch mount has the right (leading) leg of the stitch on the front of the needle.
Wrap-and-Turn Method
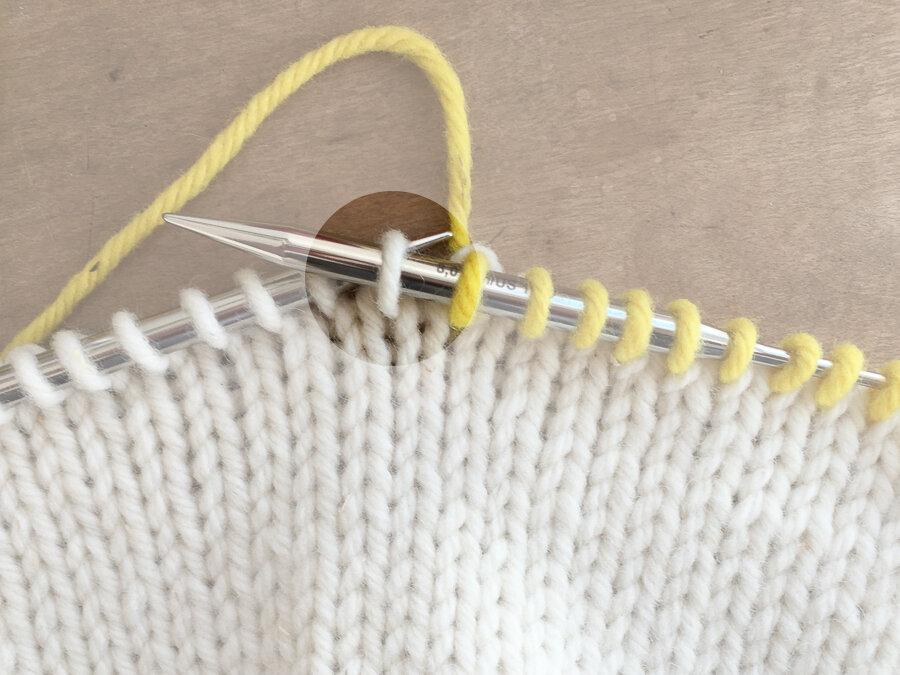
In this common method, the turning yarn is wrapped around the first unworked stitch (the stitch that immediately follows the last worked stitch). The way that the stitch is wrapped depends on whether the knit or purl side is facing.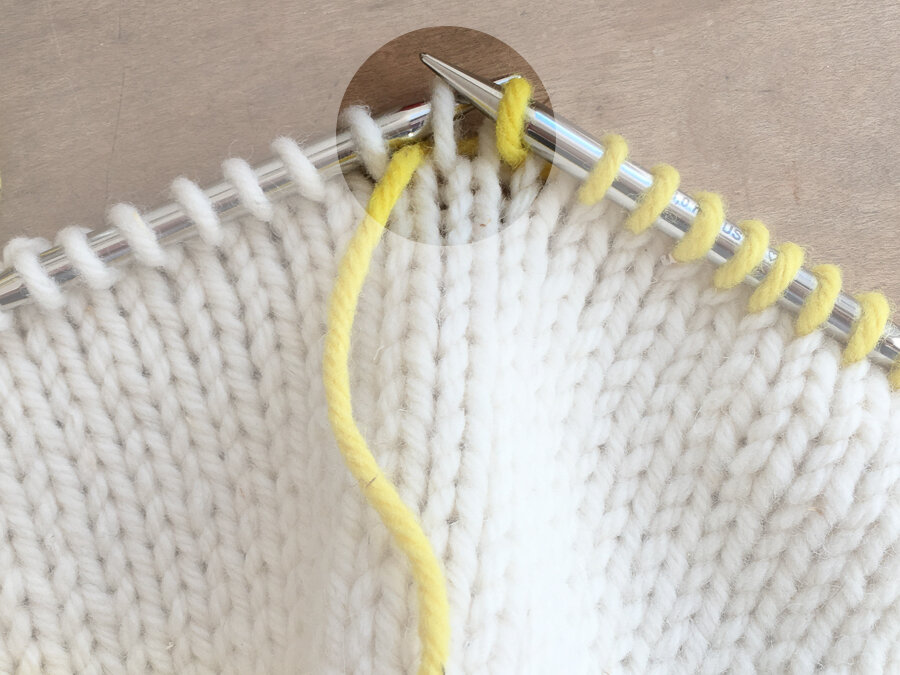 Knit side facing: Knit the required number of stitches to the turning point, slip the next stitch purlwise to the right needle (Figure 1), bring the yarn to the front between the needles, return the slipped stitch to the left needle (Figure 2), bring the working yarn to the back between the needles, and turn the work so that the purl side is facing—one stitch has been wrapped and the yarn is correctly positioned to purl the next stitch.
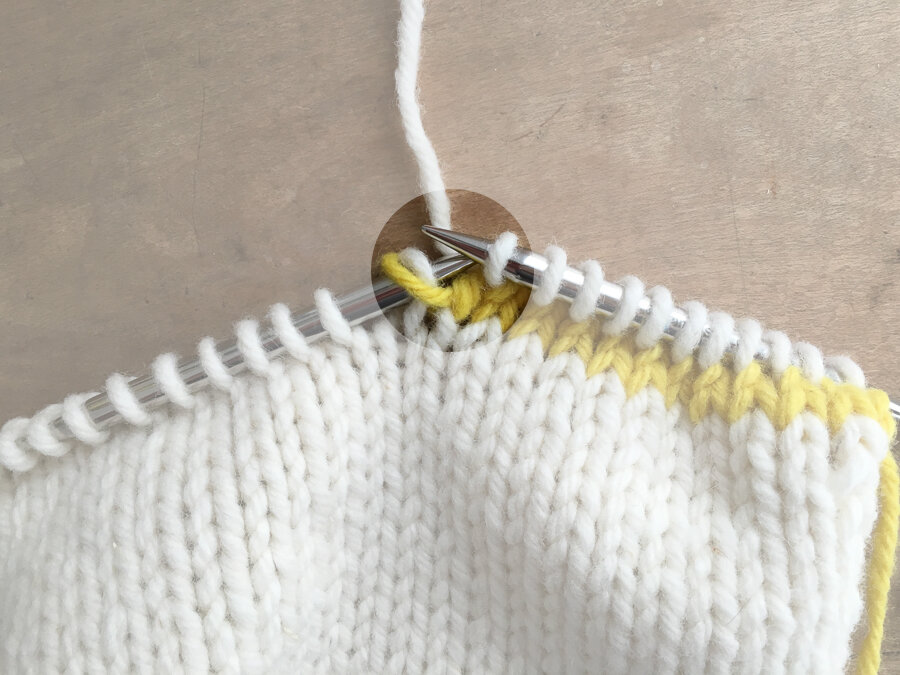 Eventually, you will knit across the wrapped stitch—maybe on the next row or maybe several short rows later. When you do, hide the wrap (the horizontal bar of yarn across the wrapped stitch) on a knit row as follows: knit to the wrapped stitch, insert the tip of the right needle into both wrap and the wrapped stitch (Figure 3), and knit them together. This forces the turning yarn (the “wrap”) to the back (wrong-side) of the fabric.Purl side facing: Purl to the turning point, slip the next stitch purlwise to the right needle, bring the yarn to the back of the work (Figure 4), return the slipped stitch to the left needle, bring the yarn to the front between the needles (Figure 5), and turn the work so that the knit side is facing—one stitch has been wrapped and the yarn is correctly positioned to knit the next stitch. To hide the wrap on a subsequent purl row, work to the wrapped stitch, use the tip of the right needle to pick up the turning yarn from the back, place it on the left needle, then purl it together with the wrapped stitch.
 Purl side facing: Purl to the turning point, slip the next stitch purlwise to the right needle, bring the yarn to the back of the work (Figure 4) and return the slipped stitch to the left needle.
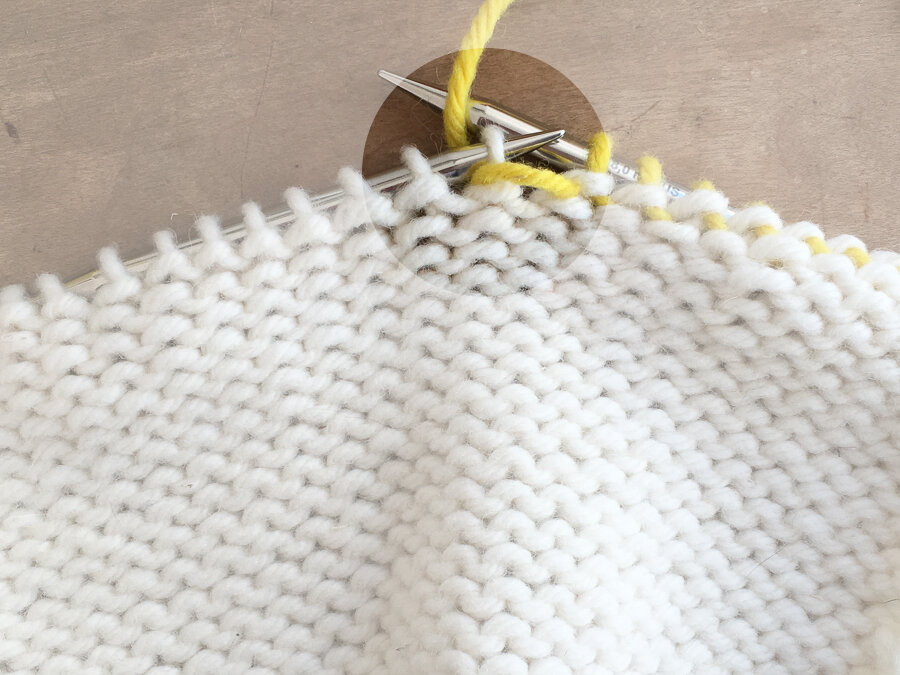 Bring the yarn to the front between the needles (Figure 5), and turn the work so that the knit side is facing—one stitch has been wrapped and the yarn is correctly positioned to knit the next stitch.
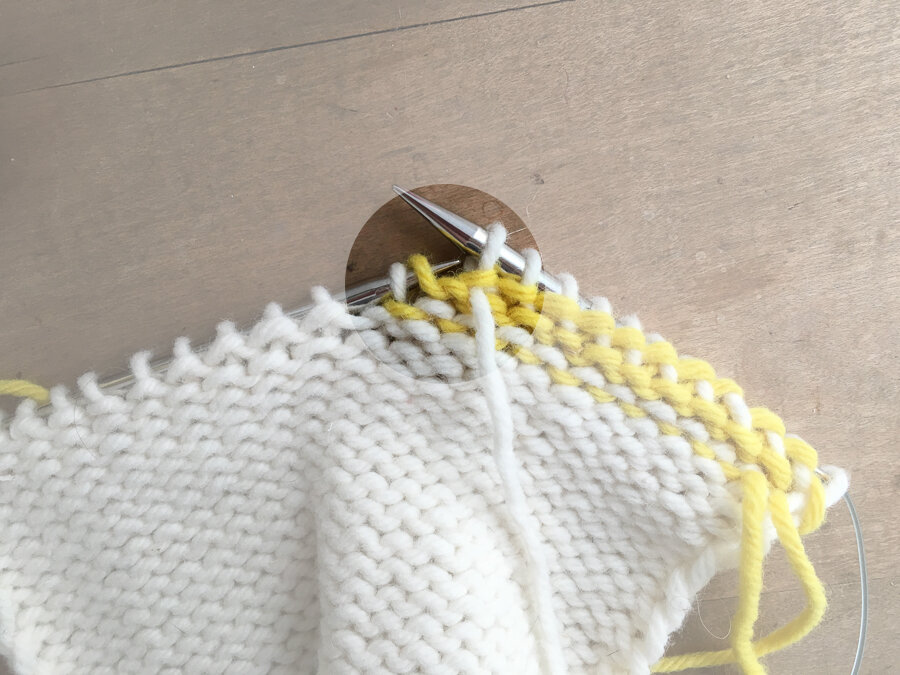 To hide the wrap on a subsequent purl row, work to the wrapped stitch, use the tip of the right needle to pick up the turning yarn from the back, place it on the left needle (Figure 6), then purl it together with the wrapped stitch.